


By setting up some custom buttons or actions you can ensure that users remain in Experience Editor reducing the need to switch back to Content Editor. While an obvious time saving this also prevents unintended errors such as content overwrites. In this post I walk through an example of adding a new button to the Chrome. The button will be assigned to a placeholder and when clicked allow the content authors to group all of the components in the placeholder into a single component.
Step 1: Create a Placeholder button
Our first step is to create a new button for placeholders. Since we want this placeholder button to appear on all placeholders this is done in the Default Placeholder Buttons folder.
- Login to the Sitecore Desktop.
- Switch to the Core database.
- Navigate to /sitecore/content/Applications/WebEdit/Default Placeholder Buttons
- Create a new item “Convert Content Block” using the template /sitecore/templates/System/WebEdit/WebEdit Button
- Fill in the fields as shown in the following screen shot:
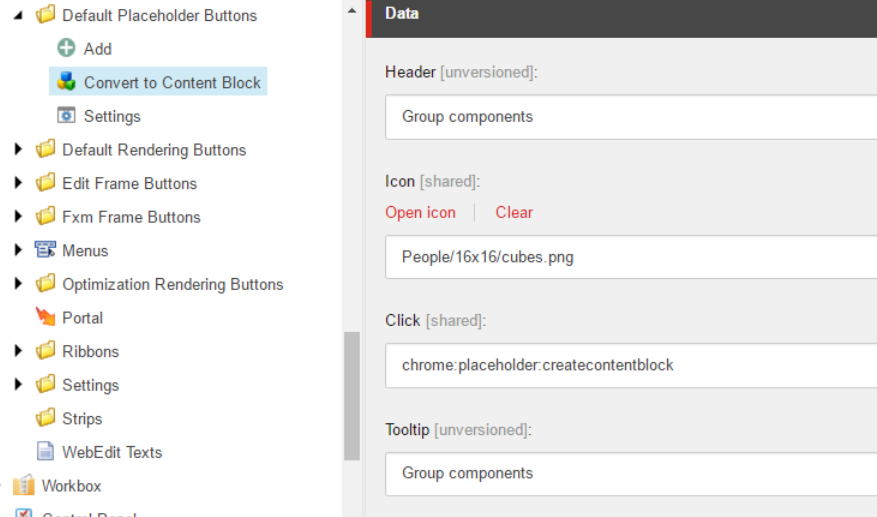
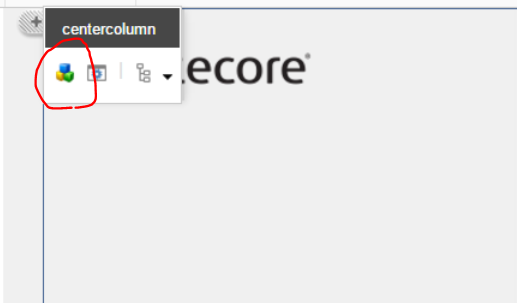
If you now open a page in Experience Editor your new button will show in the placeholder Chrome.
Step 2: Extending the Placeholder object
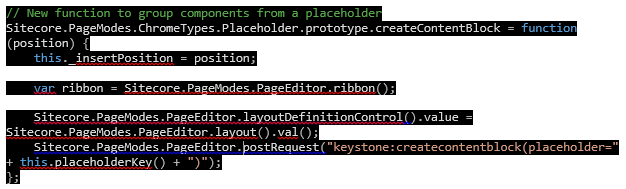
In the button the click was set to chrome:placeholder:createcontentblock. This is a message that will be interpreted by the Placeholder object defined in the Experience Editor JavaScript at /Sitecore/shell/Applications/Page Modes/ChromeTypes/PlaceholderChromeType.js
I am not a fan of changing Sitecore's core JavaScript, so we will take advantage of JavaScript’s extensibility to add / override the code we need. Create a new JavaScript file /Sitecore/shell/Applications/Page Modes/ChromeTypes/PlaceholderChromeTypeExtensions.js and add the following code.
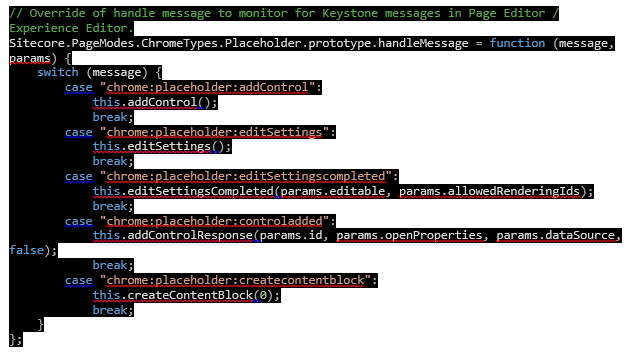
In the same file we also need to override the handleMEssage function to listen for our button. The below code block is the out of the box method with the case added for createcontentblock.
Step 3: Inject custom JavaScript into the Ribbon
Now that we have our custom button and JavaScript we need to insert this into the Experience Editor ribbon. The bundle that drives Experience Editor is generated by a pipeline. We are going to patch it.
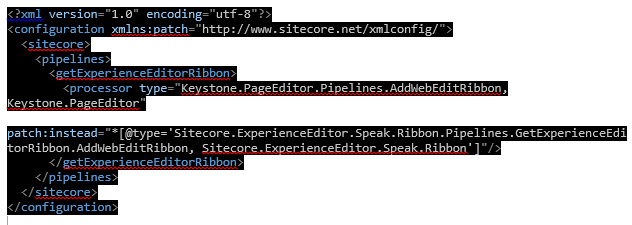
The code for this processor:
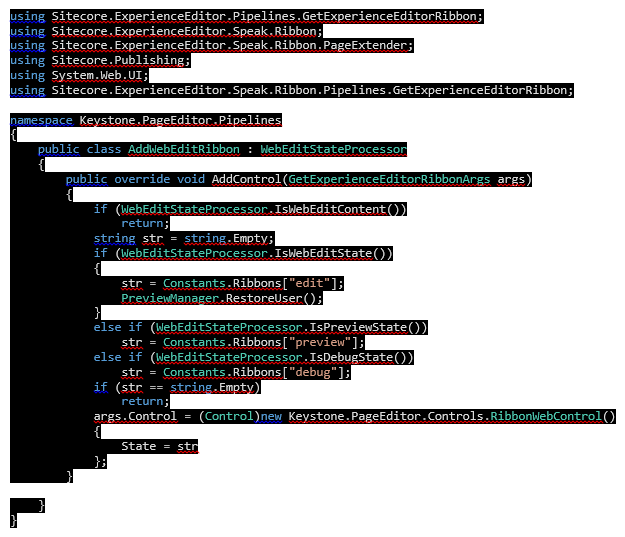
It feels like a bit of overkill but to get our custom JS into the bundle I created a RibbonWebControl:
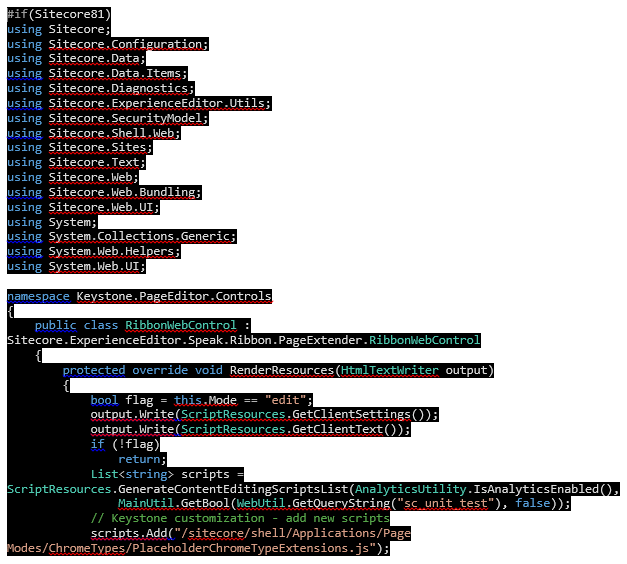
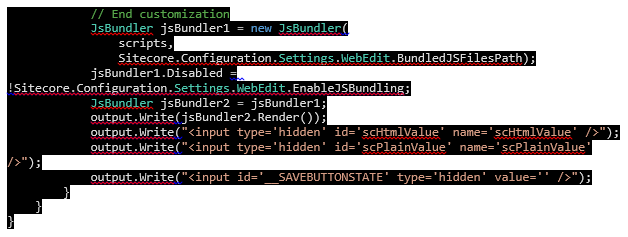
Step 4: Implement custom command
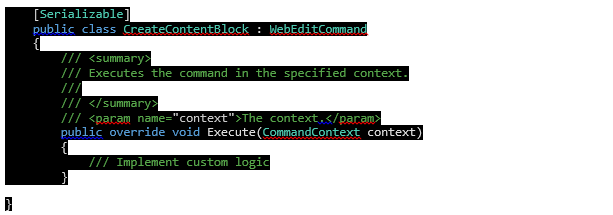
The final step is to implement the custom command. In the code listed previously you will see keystone:createcontentblock. This is a custom command that implements your business logic for the button. The signature of the class you would need is noted below. We’ll not cover the specifics in this post as it is beyond the scope of our topic.
Final thoughts
As you can see from this post it is possible to quickly extend the Experience Editor and still protect an upgrade path. When planning your next Sitecore implementation we hope you consider optimizing high use or high complexity flows to make the life of content marketers easier.


