


junho 02, 2016
A closer look at the Sitecore Federated Experience Manager (FXM) introduced in Sitecore 8.0.
Introduction
In a previous blog post we took a look at the Federated Experience Manager (FXM) introduced in version 8.0 of Sitecore.
Now that this feature has been around for a little while and some of the initial bugs in the product have been addressed it’s time to take another (closer) look.
First of all I will say that if you are looking to take full advantage of FXM you should seriously consider upgrading to Sitecore 8.1 (which is currently on update 2). A lot of the initial bugs and usability issues were addressed in this release.
Audience & Workflow
While FXM presents your external site’s pages within an Experience Editor-like interface it’s important to note the FXM editor employs significantly different concepts than those in the Experience Editor and may not be intuitive to non-technical users. In some cases it may even be your Sitecore developers who are responsible for administering FXM.
In any case, the following sequence of events is recommended when working with FXM:
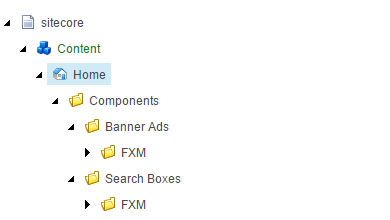
- Select an area of your content tree separated from your website content to store the content component data sources you will use for FXM and focus initially on the creation of the datasources / content
- Break down the target site into distinct areas that you would like to inject Sitecore managed content into. These will help you to create your page filters (more on this to come)
- Access the FXM Experience Editor and setup placeholders
Data Source Organization
While your development team will likely be setting up and configuring your FXM implementation, your content authors may be the ones managing the content going forward. For this reason, dedicate an area of your content tree to FXM data sources to make it clear to your content authors they are editing the correct items.
Page Filters
While it’s not immediately obvious, page filters are critical to being able to control what sections and pages of your external site will have content injected into them. Filters can be setup in many ways but this should be your next step after preparing your content.
Since FXM no longer creates items in the content tree that represent your external site pages, page filters control the scope of content being injected from Sitecore. Page filters can be used to target individual pages or groups of pages.
Another key feature of page filters is the ability to associate goals or campaigns with them. Among other things, this ability enables you to create personalization scenarios, such as tailoring content depending on what sections of a site the current user has visited.
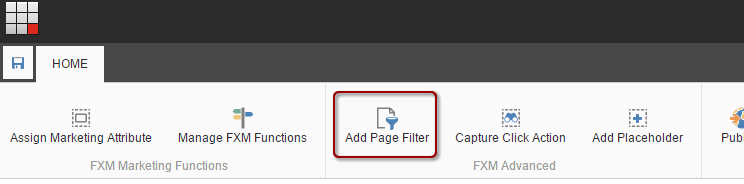
Once your page filters are defined, clicking on “Manage FXM Functions” will display them as “folders” that you can create your placeholders in. This essentially scopes content injection to a page filter.
This essentially scopes your placeholders and the components added to your placeholders to their parent filter, meaning that only if the current request matches the rules of the page filter will your content be injected into the page.
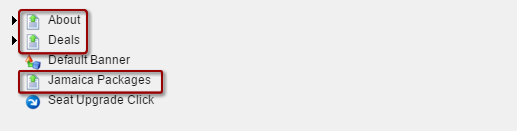
In this simple example we have an About section, a Deal section and a Jamaica Holiday Packages section defined on our external site.
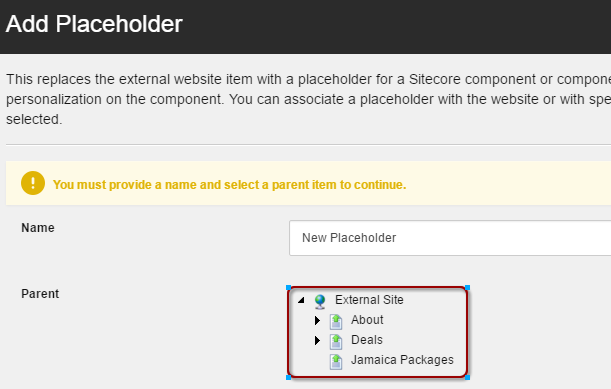
Add Placeholders
Now that we have the ability to be specific about where content will be injected into the external site using page filters we can now go ahead and add some content.
Of the all the areas of FXM this is the area that most closely matches the Experience Editor experience. The major difference is that instead of having pre-defined placeholders available on the page we have to click on the page to create placeholders. Part of Sitecore’s ability to dynamically create placeholders relies on well-structured html in your target site. If the external site has things like html elements with no closing tags, unless you can tidy up the markup on the external site, Sitecore will likely struggle to create dynamic placeholders.
Assuming your external site has well-structured markup, creating a placeholder should be as simple as clicking on the area of the page where you wish to add a placeholder. You will be asked which “parent” you want to add the placeholder to, this is where you select your previously created page filters. Again, the page filter allows us to be specific about which pages / requests our content will be injected into.
Once your placeholder is setup, adding components into placeholders is essentially the same process as adding content components to regular Sitecore pages, selecting data source, and setting up personalization rules etc.


