


Creating a MongoDB Deployment
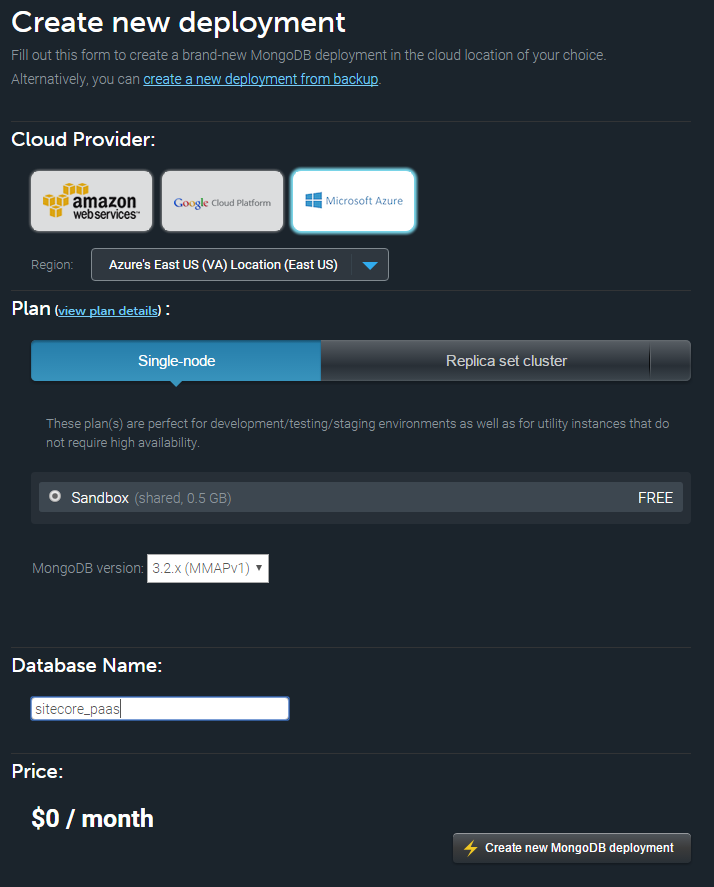
- After logging into your mLab account, click on the ‘Create new’ button for your MongoDB Deployments.
- Select your Cloud Provider (in this case I chose Microsoft Azure)
- Select your provider Region.
- NOTE: Not all regions offer the free Sandbox single instance database. If you are testing or trying to set up development environments, make sure to pick a region that supports the Sandbox instance. You will also want your instance relative close to where you plan to host Sitecore.
- Select your Plan. In most cases when first trying out Sitecore PaaS, you will want a single-node Sandbox.
- Select the MongoDB version you would like to use. For Sandbox, there is only a single version available.
- Specify a Database name (all lower case)
- Click the button and you’re ready to go with your 0.5GB of data!
Sitecore Database Procurement Steps
In order to support Sitecore XP, we need 4 separate databases attached for our deployment:
- Analytics
- Tracking (Contact)
- Tracking (History)
- Tracking (Live)
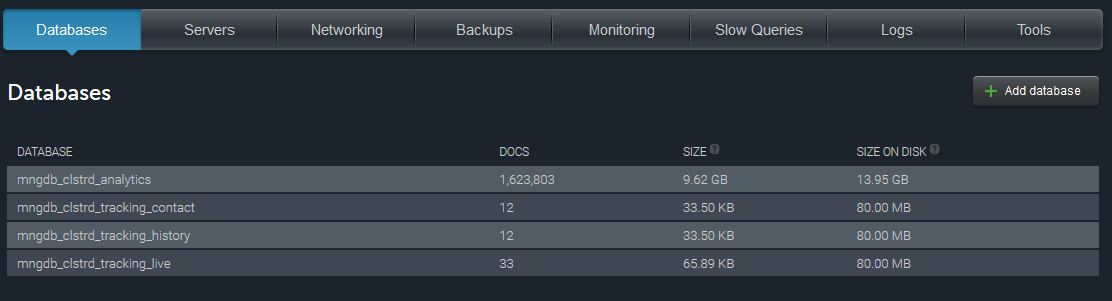
A note on mLab pricing plans: You can only have multiple databases in a single MongoDB deployment when selecting a dedicated plan option. If you are using one of the dedicated plans, you will need to access the cluster and then create your four databases. This screenshot shows an example of a dedicated plan cluster with four databases:
If you are trying to setup development environments using free Sandbox databases, you should note that the Sandbox version only supports a single database per deployment. This means you will need to create four separate deployments with a single database in each. Repeat the MongoDB deployment creation steps (above) and provide the database name each time until you have created all necessary Sandbox databases. This screenshot shows an example account with four deployments, one for each database:

Database User configuration
The database must have at least one user associated to it in order to connect to the database. Using the example of a sandbox deployment, follow these steps:
- From the deployments screen, select the sandbox deployment you wish to edit.
- Change to the ‘Users’ tab.
- Click ‘Add database user’ button. A dialog will show.
- Complete the dialog and save changes (take note of your password, you will need this later).

HINT: If you are coming from a SQL Server background, you are probably used to creating a single user and assigning it to all the databases. The database users here do not quite work like that, but you can make sure all your databases have users with the same username and password. From a connection string perspective, it will look like a ‘single user’.
Get started with Sitecore PaaS!
You now have your Mongo databases all procured. Make sure to take note of your connection details for each database so you can use these when spinning up your Azure environment.
Keep calm and Azure on!


