
First off, what is it?
Think of Planner as a “Project Lite” collaboration workspace similar in nature to Office Groups however, with a greater focus on tasks and associated statuses. If as an example you have worked with Atlassian’s Jira, you might see some similarities but not a direct replacement.
Planner consists of the following key attributes and capabilities:
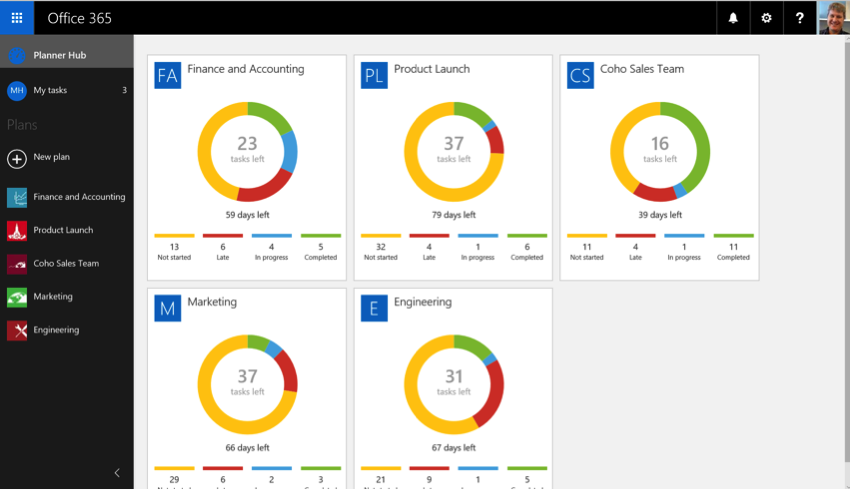
- Planner Hub - A consolidated view of all of the plans you are a member of.
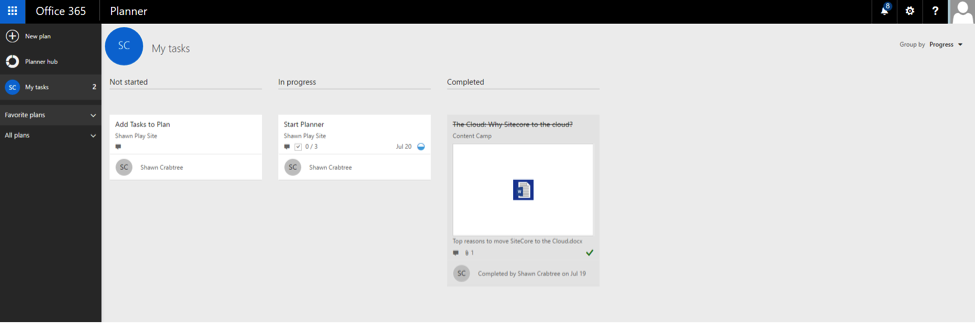
- My Tasks - A summary view of all tasks assigned to me and their associated state (IE Not Started, In Progress and Completed)
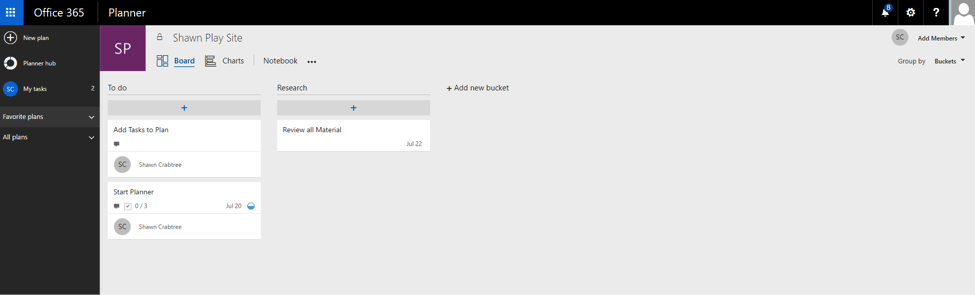
- Planner Board - A place where you can organize tasks in “Buckets” with their status and who they are assigned to.
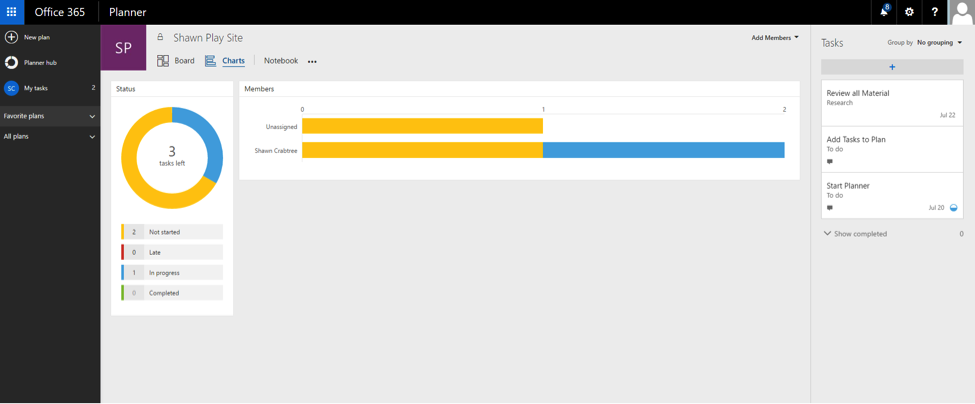
- Charts - A visual presentation of tasks, their status and a summary of all of the team’s members and their status of tasks and completion.
- Notebook - A OneNote workspace for the entire team to collaborate.
- Calendar - Your Outlook Calendar.
- Files - A common area for the team to store and access files.
- Conversations - An area for threaded discussion.
Getting Started
Creating a new “plan” is quite simple:
- Simply navigate to the Planner “App” in Office 365. (Or visit tasks.office.com)
- You will see the left navigation summary view including the Hub.
- Create New Plan, providing the appropriate details.
- This also creates the Office 365 Group associated with this Plan
- Next, I recommend you create your team by navigating to the “Members” area of Planner.
- Now, go ahead and start creating your tasks:
- Task Name and Description
- Start Date and Due Date
- Create a Check List if required
- Attach any associated files or URLs for this task
- You can assign the task now however this is an easier way with Drag and Drop
- That’s it!
- Create Buckets - typically tasks are associated with a grouping of work such as Plan, Develop Test and Deploy. By Grouping your tasks in meaningful Buckets you have somewhat of a Workflow View in the Boards and Charts are of the Planner workspace.
- Assigning tasks via drag and drop – On the task view, review the team photos as shown at the top of the Planner Site and drag and drop the photo of the user onto the specific task
Congratulations you have created your first Collaboration project in Planner!
A few more tidbits
- Planner currently does not support adding Members outside of your Organization, this capability is in development
- You can only assign one Member per Task if you need multiple Members create Tasks with similar names and place into the Bucket. This feature is also in development
- Consider adding labels in the Task View to further illustrate Process State
- The Planner Board currently does not support a “Timeline” view as this is currently in development
- Notifications are delivered into your Outlook inbox, these can be annoying so you may want to setup an Outlook inbound filter
- It would be nice to visually brand your Plan, customizing background is in development
For more help with Getting Started with Microsoft Planner
To see what’s coming for Microsoft Planner visit the Roadmap